Friday, March 20, 2015

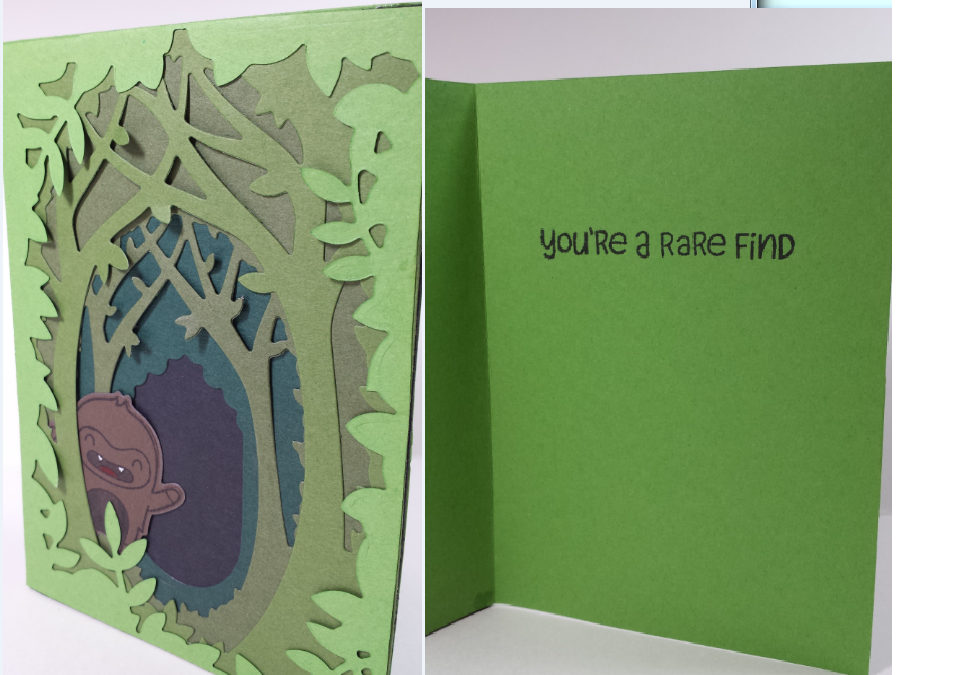
Sasquatch Card


I have only recently gotten excited about using wafer thin dies with my Cuttlebug.  I was very focused on my beloved Cricut and the numerous lovely cartridges offered.  However, with so many adorable creations shown on Pinterest, I haven't been able to help myself but explore the stamps and matching cutting dies.  I am not overly fond of coloring, so I am careful to pick sets that do not require too much of that effort.  Lawn Fawn has quickly become my favorite companies.

I have had the Yeti, Set, Go stamp and die set from Lawn Fawn for a few months, but have not created anything yet.  Then when I saw the Woodland Build-A-Scene Die set from Xcut, it was like *WHAM* those two sets HAVE to go together.  I know that this little guy is a Yeti, but I cut him out of brown paper and thought he definitely looked like a big foot.


Cardstock: 4 shades of green, brown, black. 
I made the 4"x5.5" card itself using the same paper as the top layer.  
Ink: Ranger Distress Ink - Black Soot
Markers: red, grey and a white opaque pen
Lawn Fawn: Yeti, Set, Go stamp and die set
Build-A-Scene Dies: Woodland


Here are the stamp and die sets involved.  I cannot wait to create so many more things with these products.  

Here is one more picture of the front of the card without the fancy "detail revealing" camera angle.
The top layer is very close to the edge of the 4"x5.5" card, next time I will definitely make a larger base.  Also, I tend to prefer tape runner type adhesives, but with the Woodland layers I used a wet glue.  This is to enable a bit more movement and time to make adjustments of the delicate edges.
Monday, March 16, 2015

Thank You card

I went on a woman's retreat this last weekend sponsored by my church and one of the speakers really stepped out of her comfort zone to give her testimony story.  It meant a lot to me and I wanted to create a quick, cute card to send her as a thank you note.  I made this blank card with a sweet little bee on the front.  I wished I could have spent more time to create something more elaborate, but sometimes simple is just better and fits the need.

Cardstock: black and 3 shaded of yellow
popdots
precut card with envelope - 3.5 by almost 5"
  --I am just using up some precut blank cards I was gifted
Hambly Screenprints - Rain Clouds overlay cut to size
Create a Critter - Bee on pg 68 cut at 3.5"


Thursday, March 12, 2015

Campfire Birthday Card

The card I created for my brother's birthday is especially adorable.  Sure, that is the last thing a grown man wants, but it was fun to design and make.  Plus I like how it ties together an experience he had with my little boy.  They had a chance encounter one evening where uncle and nephew were given an opportunity to hang out together around the campfire.

Front:
Campin' Critters - 2 1/4" Porcupine and a second porcupine of the same size using Cricut Flip feature
Create a Critter - 1 1/4" camp fire, I reversed the fire layers to hide the smiley face
Cuttlebug - Candy Cane - Since the card size is larger than the embossing folder, I was very careful to line things up and run the paper back through to continue the design.


Inside:
Art Philosophy - 3 1/4" Star Rectangle Decorative Layer
Wild Card - 6" Happy Birthday phrase

Coming back

My crafting took a nose dive for about 2 years.  Between light scrapbooking, pregnancy, having the baby plus the chaos and exhaustion of the first year, I just didn't have it in me to craft much, and when I did craft, I didn't blog about it.  I have made some wonderful cards and sent them away and well, those will just have to live in that moment.  Card making and scrapbooking has taken a dramatic turn in these past couple of years and there are just TONS of new and unique tools to make spectacular works of art with the greatest of ease.  I can't wait to show you some of my creations as I start to post again.